
Tenda Router Setup Guide: Detailed Step-by-Step Directions
Strong, secure, and dependable internet access depends on properly configuring your Tenda router, whether you recently bought one or are attempting to modify your current one. Regardless of your level of technical experience, we’ll walk you through each step of the Tenda router setup procedure in this in-depth tutorial.
This page has all the information you need, whether you’re attempting to set up your Tenda WiFi router for home use or are having difficulties connecting. We’ll also walk you through the process of setting up VPNs, wireless passwords, and accessing the Tenda router configuration page.
Reasons for Selecting Tenda Routers?
Tenda is renowned for offering networking equipment for home and small office usage that are affordable, dependable, and simple to set up. Their routers provide features like parental controls, dual-band connection, and sophisticated security measures that are usually reserved for more costly versions.
Tenda router configuration is intended to be as easy as conceivable for users. However, many people may have difficulties if they are unfamiliar with the vocabulary or interface. We made this tutorial to help you set up your Tenda router as easily as possible.
Things You Must Have Before Starting
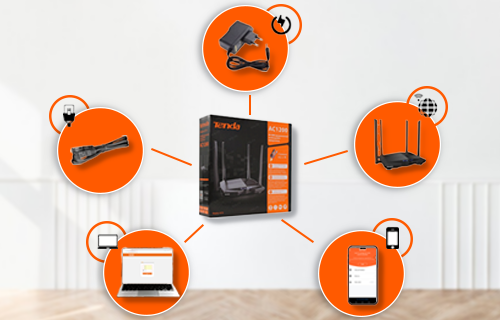
Make sure you have the following before we begin setting up the Tenda WiFi router:
- A brand-new or factory-reset Tenda router
- The packaging includes a power adapter.
- A cable for Ethernet
- A modem that is currently connected to the internet
- A computer, tablet, or smartphone to see the setup page
How To Setup A Tenda Router Step-By-Step
To get your Tenda router up and running, follow these steps.
- Attach your Tenda router.
- First, connect your router physically:
- Connect the router to a power socket and plug the power adapter into it.
- Connect your modem to the router’s WAN port (often indicated by a blue or yellow sticker) using an Ethernet cable.
- Use an Ethernet or Wi-Fi cable to connect your device—a laptop, PC, or smartphone—to the router.
- Typically, a sticker on the back or bottom of your router will have the password and the default Wi-Fi name (SSID) printed on it.
- Go to the Tenda Router setup Page
- Open the web browser of your choice and type in 192.168.0.1 or tendawifi.com.
- You will then be required to generate a login password on the Tenda router setup page.
- The router can take you straight to the configuration wizard if this is your first time signing in.
- Access your Tenda router by logging in.
You will be impelled to input your login information when you visit the setup page. After a factory reset or for new users, use:
- Username: (often admin or blank)
- The password is often admin or blank.
It is advised to switch them to something secure after logging in. For recommended practices, see our section below on setting the password for a Tenda wireless router.
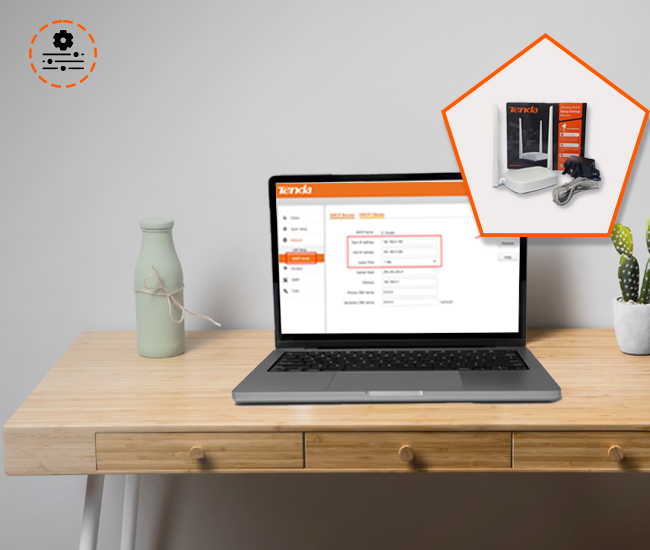
- Set up Internet Preferences
You’ll find choices to set up your internet connection after logging in. Typically, Tenda routers provide the following kinds of connections:
- DHCP (dynamic IP): The most used
- IP Static
- PPPoE is frequently used with DSL connections.
- L2TP and PPTP: For VPN configurations
Configure Wireless Configuration
- Your wireless network name (SSID) and password are defined here:
- Select Wireless Settings.
- Replace the default SSID with a distinctive and easily identifiable one.
- Choose a secure Wi-Fi password and encrypt it with WPA2 or WPA3.
The basic Tenda WiFi router setup or configuration is now complete. Your personalized wireless signal should now be emitted by your device.
Manual Method For Tenda Router Setup
- Plug the router in and use the Ethernet (WAN port) to connect it to your modem.
- Turn on the router and use the Tenda Wi-Fi by default on your phone or computer.
- Launch a web browser and navigate to tendawifi.com or 192.168.0.1.
- Decide on the sort of internet connection you want (e.g., DHCP, PPPoE).
- Establish a password and Wi-Fi name (SSID).
- Restart the router after saving the changes.
- Use the updated Wi-Fi credentials to reconnect your devices.
- Update the firmware by selecting System Settings > Firmware Upgrade, if desired.
- If necessary, set up sophisticated options like guest networks or parental restrictions.
How To Exexute WPS Setup Of Tenda Router
- Make sure your equipment (such as a printer or repeater) and Tenda router support WPS.
- Make that the router is transmitting Wi-Fi after turning it on.
- On your Tenda router, press the WPS knob, which is often situated on the side or rear.
- Press your device’s WPS button within two minutes.
- The connection is successful when the WPS LED stops blinking.
- WPS sets up security settings automatically, so no password is needed.
- Verify the WPS-connected device’s connection.
- Use this to quickly connect extenders, cameras, or smart TVs.
- Disable WPS later via the web interface if necessary for security.
Getting to the Tenda Router Configuration Page at Any Time
Do you need to make adjustments later? Simply type tendawifi.com or 192.168.0.1 into your browser when on the Tenda network. This returns you to the Tenda router configuration page, where you may modify firewall rules, parental controls, wifi settings, and other things.
It’s a good idea to bookmark the page or store the login information in a secure password manager for convenient access.
Advanced Configuration Choices for Tenda Router
Here are some advanced configuration recommendations for your router after it’s online.
Controls by Parents
Tenda provides integrated parental controls to restrict device connectivity over time or to block access to specific websites.
- Open the router interface and navigate to Parental Control.
- Choose device or devices that you wish to control.
- Depending on your preferences, create schedules or website filters.
Network of Guests
To give guests internet access without endangering the security of your main network, you can set up a distinct guest network.
- Select Guest Network under Wireless Settings.
- Turn it on and create a basic password.
- If necessary, choose time or bandwidth constraints.
Updates for Firmware
Firmware updates are released by Tenda on a consistent basis to augment security and performance. To see whether there have been any updates:
- Select System Preferences > Firmware Update.
- Click “Check for Updates.”
- If a new version is available, upgrade by following the instructions.
- During the update process, be careful not to turn off the router.
Resolving Tenda Router Configuration Problems
Try the following if you encounter issues setting up your Tenda router:
Unable to Get to the Setup Page?
- Authenticate that your device is allied to the router.
- Try tendawifi.com and 192.168.0.1.
- Try a new browser or clear the cache in your current one.
Not able to access the internet?
- Verify your ISP information (for PPPoE configurations).
- Restart the router and modem.
- Make sure the connections are connected correctly.
Is your router login password forgotten?
- To reset router, use a paperclip to hold down reset knob, which is often a tiny hole, for ten seconds or so. You may then restart the Tenda router configuration by restoring the factory settings.
It’s not necessary to be afraid to set up your Tenda router. Even users who are not tech-savvy may quickly set up their network using these instructions. Your Tenda router provides all the capabilities you need, whether you’re just completing a basic setup or want to set up parental controls, dual bands, or VPNs.
FAQs
What is the default IP address for Tenda router setup?
192.168.0.1 is typically the Tenda router setup’s default IP address. Additionally, you may visit the router’s web-based configuration interface and finish the setup procedure by typing tendawifi.com into the URL bar of your browser.
Can I set up my Tenda router using a smartphone?
Yes, using a smartphone to set up your Tenda router is simple. Just open a browser, navigate to tendawifi.com or 192.168.0.1, connect to the default WiFi network, and then follow the setup instructions displayed on the screen.
How do I change my Tenda WiFi network name and password during setup?
Navigate to Wireless Settings after entering into the Tenda router configuration page. There, you may create a strong password and input a new WiFi network name (SSID) before saving the settings to make the changes take effect right away.
How can I set up my Tenda router as a repeater or extender?
In the settings, select the Wireless Repeating or WISP mode to utilize your Tenda router as a repeater. Select the current WiFi network, type in the password, and make sure. By doing this, your Tenda device’s coverage is increased.
How long does it take to set up a Tenda router?
Tenda router setup usually takes five to ten minutes. This entails turning on the gadget, plugging in cables, going to the setup page, setting up internet preferences, and creating a unique WiFi name and password for instant access.